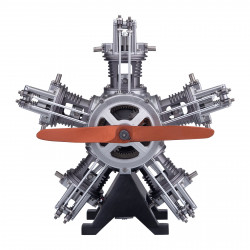
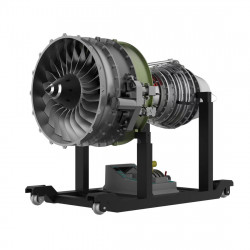
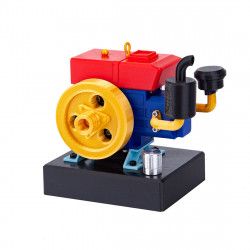
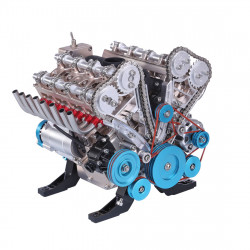
DIY Car Engine Model
Rev Up Your Craft: Exploring the World of Metal Model Car Kits
Metal model vehicle kits blend meticulous engineering with creative artistic expression, allowing enthusiasts to construct truly detailed replicas of the most revered cars in history. Ranging from classic muscle cars to ultra-modern supercars, these kits are a hands-on voyage of automotive iconography. This guide explains the allure, parts, construction, and secrets to conquering those metal model car kits and inspiring your love for this fantastic hobby.
The Attraction of Metal Model Car Kits
Hobbyists are drawn to metal model car kits to get the opportunity to work with detailed designs and reliable materials. With metal kits, the cool factor goes up, and models are real-deal miniature replicas. Their combination of challenge and creativity is something both car enthusiasts and builders love.
Highly Realistic as Well as Extremely Durable
Made from sheets of top-grade steel or aluminum, the kits included through the mail contain laser-cut parts representing actual car pieces such as chassis, hoods, and so on. The metal construction provides durability that lasts, which is why even the best models still have metal.
● Exquisite Workmanship: The cuts are accurate reproductions of delicate car details.
● Durable Construction: Compared to plastic or wood, metal is stronger and can last longer.
● Investment Collector Quality: Models hold value for collectors.
Engaging Challenge
Putting together a metal car model forces you to concentrate, use your hands, and apply logical thinking. Kits include 100–500 pieces and come in levels from novice to expert. It also helps you hone your skills, with a sense of productivity to boot.
● Brain Teaser: Develops spatial reasoning and patience.
● Skill Level: Great for beginners and advanced builders. Equal to LEGO Level. Type: Classic. Suitable for: Age 4 and up.
● What We Liked: Rewarding outcome: Once assembled, these models offer a sense of accomplishment.
Automotive Passion
Car enthusiasts just can’t stop themselves from replicating legendary autos, ranging from hulking muscle cars to born-to-run rally legends. Every kit is a shout-out to the glory days of cars and the coolest vehicles on or off the road. Builders can explore the many different themes and eras of some of the most recognizable vehicles on the planet and use the included special parts to customize their builds. The hands-on experience is comparable to building a real car.
● Vintage Appeal: Appeals to old car and new car ages.
● Personal Connection: Favorite brands and models.
● Creative Expression: Customize a bike with paint or stickers.
Understanding Kit Components
The key to the art of building a metal model car kit is understanding what the parts are. Everything in the model is functional and has an appearance-related aspect. Knowing about these components will help make for an easy building process.
Metal Sheets
Kits come with 1 to 4 metal sheets (usually 4-inch squares) and are available in body parts, wheels, and interiors. Stainless steel or alloy sheets, they need to be treated with care, or they will bend.
● Laser Precision: Parts will gently pop out with a little pressure.
● Different Thickness: Thick for frame, thin for details.
● Part Labels: Frequent numbers on parts for identification.
Assembly Tools
Many kits come with (or ask for) small tools—screwdrivers, pliers, tweezers—to bend tabs, and you use them to secure parts. No glue or solder is required; the only tools to use are your hands, and simply connect the piece material you ordered with the stepping motors and screw arm.
● Tools Included: Starter sets come with mini screwdrivers.
● Additional Tool: Precision tweezers for added precision.
● Keyed Locking Mechanism: Locks the hitch in place, secures the tab-slot design.
Instruction Manual
The build is accompanied by a detailed instruction manual, complete with step-by-step diagrams. Directions detail the part order, bending orientation, and where they connect. A visualization that works is important for such complex models.
● Chart-Pattern: Pictures explain parts positioning.
● Step by Step: Helps you avoid assembly errors.
● Reference Tool: This should be by your side at all times while on the build.
Optional Accessories
Some kits come with decals, paint, or LED lighting for further customization. Those add realism, such as headlights or tire treads. Accessories may be sold separately for basic kits.
● Decals: Add logos, racing stripes, and more.
● Paints: Personalize body color or detail.
● Illumination: Any LEDs for headlights or underglow.
Choosing the Right Kit
By choosing a kit that fits your skill level, interests, and the amount of time you wish to invest, you can make sure that you’ll have a blast. Keep these factors in mind when picking the perfect model. A smart choice gets you off to a good start!
Skill Level
Beginners should start with 100–200 pieces and less complex designs, such as a traditional sedan, which can be completed in 2–4 hours. Experienced builders can handle 300+ piece kits, including supercars, that take 6 to 10 hours.
● Some Movies Are Easier: Fewer parts, simpler build.
● Intermediate: Some detail, 4–6 hours. Casual: Little detail, 2–4 hours.
● Professional: Complex designs, multiple-session builds.
Car Type and Theme
Kits fit everything from vintage cars and muscle cars to supercars and rally racers. Have a little fun. Pick based on passion, said Whalen, a history buff could go for a 1960s icon, while speed junkies might opt for a sleek hypercar.
● Vintage Classics: Embrace automotive nostalgia.
● Muscle Cars: Mean ‘n’ aggressive styling with a V8 to back it up.
● Modern Supercars: State-of-the-art engineering duplicates.
Build Time and Space
For the busy, quick builds are beneficial, while having to dedicate time and space to larger kits would not be. Be sure to have a smooth, well-lit table on which to put together and keep the puzzle. See the kit for display image planning.
● Quick Kits: 1–3 hours to see fast results.
● Big-Scale Projects: 6+ hours for large projects that call for big builds.
● Workspace Requirements: Enough space for tools and parts.
Setting Up for Success
Tools and Galacticraft itself are designed in a way that makes building significantly easier with a pre-prepared workspace and mindset. Well-organized tools, space, and procedures minimize mistakes and improve productivity. Here is a three-step process to get off to a good start.
Workspace Preparation
Spin It. Select a clean, well-lit space with ample room for parts, tools, and the assembly manual. Puzzle mats also provide for mid-build storage; a cutting mat protects surfaces. Proper lighting helps to ease eye strain.
● Large Space: Space for sorting and assembly.
● Bright LED Lighting: LED lamps for excellent detail clarity.
● Storage Option: Mats and trays to pause a project.
Essential Tools
You will need tweezers, needle-nose pliers, and a little screwdriver. A magnifying glass is good for small parts. Have a soft cloth to touch metal, but not one with fingerprints and scratches.
● Accurate Instruments: These can be pliers to make bends and tweezers to manage small tabs.
● Amplification: Elucidates complex relationships.
● Clean Cloth: The Cloth will not smudge or scratch.
Safety Precautions
Be sure to wear safety glasses when snipping parts so that you don’t get metal shards in the eye. Wear gloves for sharp edges, especially on larger kits. Have a first-aid kit available for any small cuts.
● Eye Shield: Protects eyes against debris.
● Hand Protection: Gloves for sharp metal edges.
● Kitschy Kid: Bandages for the littlest boo-boos.
Step-by-Step Building Process
A model method leads to a perfect build. Build your metal model car right with these steps! Each stage leads to a stunning, functional copy.
Step 1: Review the Manual
Read the instructions completely, noting part numbers and the order of assembly. “Look for any special instructions,” such as bending directions or use of a tool. You can avoid expensive mistakes with what you already know.
Step 2: Parts Sort and Check
Pop out the pieces from the metal sheet carefully and use needle-nosed pliers to bend the tabs. Examine for damage or missing parts; if damaged, contact the manufacturer.
Step 3: Assemble the Chassis
Begin with the vehicle’s frame or chassis and join base plates, structure pieces. Keep tab-slot (into the slot) tight to ensure the establishment. The model has a sturdy chassis.
Step 4: Construct the Body and Details
Install the remaining body panels, hood, and doors, bending tabs to lock them in place. Screw on items such as mirrors or spoilers, making sure that they are lined up. Test moving parts, such as doors, to see that they work smoothly.
Step 5: Install the Wheels and Accessories
Lock wheels and ensure they turn freely if applicable. Apply decals, paint, or light it for realism. Follow mechanical direction for placement so as not to hinder mechanics.
Step 6: Test Fit and Finish
Testing that the button caps are in. Check for loose connections and test any moving parts, such as wheels or hoods. Buff with a soft cloth for extra shine. Put them on shelves or a mantle to show them off with a sense of class.
Overcoming Common Challenges
The hurdles could be fiddly connections or delicate parts with a metal model car kit. Proactive remedies to keep your build on course. These quick tips easily solve common problems.
Misaligned Parts
Slots may not receive tabs because they have been bent wrongly or because of foreign matter. Pliers to accurately set angles. Dust the slots lightly using a soft brush for a better connection.
● Angle Adjusting: Relative to the slot shape, the tabs could be bent.
● Clean the Parts: Clear off any dust or metal shavings.
● Dry Fit: Test connections before gluing.
Fragile Components
Small pieces like mirrors or antennas can bend or snap off. Use forceps, and apply as little force as possible. Keep small parts in trays so they are not lost during assembly.
● Be Easy: No need to squeeze hard.
● Storage Trays: Keep pieces from getting lost.
● Replacements: Contact the manufacturer for additional spares.
Confusing Instructions
Dense manuals can overwhelm. Deconstruct steps into smaller steps and work on them one at a time. Use forums or video if you need visual aid.
● Tas
