Build: Tenyo Minion Model

Build: Tenyo Minion Model
Being able to construct this model makes me very happy. Produced by Tenyo Metallic Nano, a sister firm of Metal Earth's Fascinations, this Minion miniature is an exclusive model from Universal Studios Japan. Unfortunately, I'm not as wealthy as my model collection would suggest. I usually find the majority of my models on eBay or through Fascinations contests, though I'm not doing that anymore. Because of the high shipping prices and limited supply in the USA, I had no intention of buying many of these Tenyo models. However, after a colleague builder and I discovered that we had some duplicate models in our build queues, we had to make a trade, and I got the better deal.
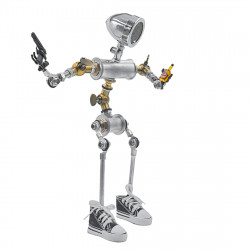
Given that Universal has begun doing exclusives at their US parks with Metal Earth, likely, this won't likely be exclusive to Tenyo or Universal Studios Japan for very long. But here is Bob, in all his splendor, even with Teddy, his little friend! The classic eyes as glasses are right there, staring you in the face, and the yellow and blue denim really stand out. He is simply cute! There's no avoiding that. I adore it!
Furthermore, if you are at ease with curves and domes, it's actually much simpler than it appears. Moreover, the domes are sufficiently large to appear less intimidating than they actually are. Even with my infatuation with curves, I managed to construct this model in a little more than an hour. This build only bothered me in two places, one of which was entirely my fault.
First of all, I made the dome a bit too complex for this model's head. Every time I make a dome, I aim to make the base spherical. But that's not a smart idea with this model. Its sides are meant to be flat; rounding them results in excessive overlap and makes it difficult to assemble properly. Since it's challenging to uncurve metal, I had to undo all of my rounding and still didn't quite get it quite correct.
Dealing with the eyes and goggles, however, was the actual challenge. Once more, it's because of the tabs that make it nearly hard to fit a flat surface inside a curved one. Two tabs hold both eyes in place inside the goggle rims. Unfortunately, adding longer slots or angled tabs makes this complex, and working in such a small area is even more difficult. However, it was a little simpler with a minor adjustment, namely, angling the tabs using pliers. I hope the short clip below clarifies what I mean by that.
Although it was easier to close up that way, I still ended up with the flat eyes tilted at an angle within the goggles. Before closing the cylinder, you should straighten the eye itself because, once closed, it becomes quite tight and difficult to modify. The goggles must then be wrapped around the head. The goggles should be connected at the front first, then wrapped around to the back, and that tab should be closed last, according to the instructions. I did it the opposite way, folding the back tab inside out, but that made it a little harder to attach the goggle lenses on the front.
Lastly, the typical link to my build's YouTube video. This time, instead of a playlist, there is only one video because it is so brief. I chose a black backdrop to attempt something a little different, but I somehow missed the banding that nevertheless made an appearance, along with a few strange saturation jumps. I apologize for it. Additionally, I frequently stepped out of frame while attempting to get a close-up view of objects. I apologize once more.
