Review Build: Duesenberg J

Review Build: Duesenberg J
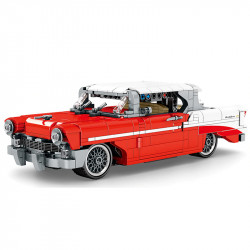
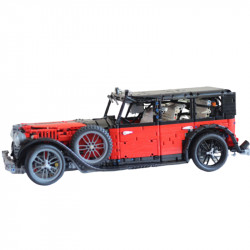
Whoa. Simply amazing. They don't design cars the way they used to, even though I know I've mentioned this before. Over time, a certain elegance and class have diminished. Cars aren't as much of a luxury as they once were, so that's a big part of it. Even though I'm not a vehicle enthusiast, this 1935 Duesenberg Model J looks fantastic.
If the title's prefix didn't tell you, this is a build of a model that I was supplied by Fascinations to review, and I'm thrilled they did. It's wonderful. I'm grateful. I am fortunate to have been given a chance to offer frank evaluations of buildings such as these. Although I probably would have eventually picked this up on my own, I get to do it sooner than I anticipated.
Let's imagine that before the pictures were taken, I corrected the bent leaf spring after noticing it. Thus, disregard that. Additionally, disregard the obnoxious dog hair that photobombed a couple of the shots.
The wheel design of this model is my favourite feature. The white walls and curving spokes are simply stunning. The model's undercarriage is also filled with numerous embellishments, such as an exhaust system that arcs over the rear axle. I adore that the Metal3dpuzzles model includes these features, which are typically invisible. The signal lights on this model are my least favourite feature, But that's because I formed them in such a bad way.
According to the official challenge rating, this model is not considered extremely difficult. And that's true for the vast bulk of the build. However, I had to make up kid-friendly curses in a few spots (I make my models in the living room, so.. yeah). This isn't meant to intimidate you; know that there will be some worthwhile trials along the way. And you are undoubtedly anticipating it if you are creating these models. Aren't we a peculiar group?
Reading the instructions in advance is one of the things I suggest. This construction is no exception, beginning with the initial set of folds. You may become discouraged attempting to determine the exact amount for each of the folds at the front end if you only look at the folds that are specified for Part 1. But if you continue reading, you'll notice that Part 1 is connected to Part 8 by multiple slots. In order to ensure that you fold the correct amount, you might compare the two pieces and pull that part early. Additionally, it aids in locating one of the folds in this instance, as the diagram was unclear to me (the frontmost fold is located on the rear edge of the front axle).
Next, I want to draw attention to the exhaust pipe's form and curvature beneath the rear axle. The narrow strips on Parts 13 and 15 are used for this. They meet in the centre beneath the axle as they both curve downward and then return up to level. Examining the axle and spacing as you approach the attachment of these various assemblies may help you gauge how much to curve these pieces.
The time-consuming operation of producing Part 14, the more considerable base portion of the undercarriage, is sandwiched between the formation of those two pieces. Additionally, I don't really agree with the sequence in which the instructions depict the many folds and curves in this flow. In my opinion, the following arrangement would make the flow much more seamless:
- The two parts at the back of part 14 (wheel wells) should be bent and folded. Fold the side flaps (running boards).
- Part 14's front section (wheel wells) should be curved.
- From the domes, which are the signal lights' backs.
- Adjust the license plate and signal lights by twisting their arms into place.
- The inside tabs should be folded into place.
Making it as simple as possible to shape the curves is the primary reason I suggest this order. The flaps may obstruct the cylindrical shape you are shaping the part over if you fold them before forming the curves. More importantly, though, you don't want to shape those damned signal lights right before the conclusion. Yes, I did. I have no idea why, but I did. It was also an error. They wind up in a very challenging place to form, and the outcome isn't very appealing to me, at least. The issue is that it is difficult to fine-tune the curves there. I kept messing it up in an attempt to make it appear friendly, and I nearly broke off some of the dome's "petals" in the process.
As I went along, I discovered that the Delorean's instructions were similar to those for this model. In particular, the steering column (part 22) was rendered with a slant that went in the incorrect direction, which caused the render to be attached at an odd angle that might confuse you a little. I've made an effort—possibly not very well—to provide a more accurate rendering, but I won't devote as much time to it as the Delorean instructions because I'm under schedule with this post.
Although I really enjoy the way the leaf spring suspension pieces (26 and 27) appear, I found it difficult to attach and maintain their shape. Pre-curve the components, smooth off the ends, and then wait until you've attached both of them before worrying about correcting the curvature.
Although the construction of the wheels is quite simple, I decided to add the doming or curved shape to the spokes (part 30) before adding the hub (part 31). There is enough space inside the wheel for the tabs so that you can twist them there. I then attempted to gently press the spokes back out somewhat to meet the wheel rim that is angled in from the wheel side after attaching them to the wheel side. Once more, one of my favourite aspects of this project is this shaping.
The next step in this project is constructing the bumpers, which is one of the more delicate steps (apart from forming the rear of a light). These are a series of thin strips that must be joined together and have one set of ends twisted around the other. The most excellent solution was to pre-curve the bumpers' very tips while leaving them slightly oversized. After that, I completed the curve around by slotting them onto the undercarriage. Additionally, I twisted and then folded the tabs holding these bumpers in place. I know from experience that unless you have a firm grip on the strip, you are in for a lot of pain if you attempt to fold tabs that protrude from the side of narrow strips like that. I had to twist and fold since I didn't have that option.
It's crucial to understand that the body and hood are flat when creating them. I assumed it had a tiny curvature across the top, and it does, but only just. The edge is where the majority of the curve is located. For instructions on how to curve sections 36 and 38, see the bottom of parts 39 and 41. Oh, and the hood's front curve is a little more prominent than the hood's back curve (part 36). Finally, I would like to express my gratitude to Fascinations for providing the staggered spaces for the hood ornament attachment!
And now I'm typing out some recommendations that I completely ignored when building. I feel foolish since I completely missed something when I was creating this model. I only realized my error while I was typing about a section at the end of this review, and now I've scrolled back up here. Don't overlook the minor detail of curling the bottom corners inward directly in front of the rear wheel wells while assembling the body around the cabin (part 38). Even though I read the directions multiple times, I didn't notice them until now. You will face the difficulties I describe later when discussing putting the body assemblies together if you omit this.
A thin strap with tiny signal light domed backs attached to it by minuscule connection strips is what you'll be dealing with next (part 40). Once more, I had trouble with these domes; I wasn't at my best with this build. Another advantage of this one is that there isn't much to grab because the strip to which they are fastened isn't huge. Additionally, it wants to bend when you don't want it to because of some bend etching. I had a hard time getting it on right since the borders between the two components kept getting in the way, but attaching it is fun because it rests over a connection between two parts, which is cool. After all, it hides the joint.
The most annoying component of this model is the front headlight/other stuff assembly (part 42); out of all the parts, that will try your patience. There are multiple folds, two headlight domes (luckily a bit bigger than those signal lights), and two cones that form on a single section. Similar to the smaller signal lights, the headlight domes are a little easier to create because of their size, but because they are attached to one edge, I find it more challenging to get the corners of the "petals" to curve. As a result, the headlights have a hexagonal backdrop. The tiny little cones, however, present the actual difficulty. They are also attached, which makes it especially difficult to create them because of the "close quarters" and accessibility restrictions. Then there's the entertaining task of pointing ahead by twisting them on their little strips. At least they are close, even though I'm not sure if I have them in the appropriate spot. I'm hoping.
Leave the back seat (part 45) slightly reclining rather than totally folding it up. This way, you may position the tabs and finish the folding operation when you go to join it to component 43. As much as you can, avoid unfolding and refolding!
I had another issue with the instructions shortly after this. They form part 50 for both mirrors on the spare wheels using the same block of renderings. But in reality, they ought to be shaped in relation to one another in a mirrored (I know, ironic) manner. It's odd because this is the first time I've built it "backwards," but fortunately, I was able to put the one I formed aside for later and use another part to make it in the proper position.
This brings us to the front fenders, which are the most vulnerable and uncertain component of this design. I was aware going into this that things would be complicated. I had experienced similar difficulties with the front fenders of other cars. It's pretty simple to misread the curved angles and indicators. It isn't easy, even if you're ready for it. No matter how much you or I would like those spare wheels to stand up straight, you are likely to get them to sit straight, so I suggest having a close look at the 360-degree view before you begin. I eventually got it close enough after much painstaking fine-tuning. Don't work too hard to develop and refine the shape until you've connected it to the outside trim and the rest of the car.
Of course, in between forming the first front fender and attaching it, there is the somewhat randomly placed joining of the upper body assembly to the lower body assembly. This now calls back to the previous discussion of the curves I completely missed in forming the upper body assembly. Because if you leave those curves out, you will have a real challenge getting the two halves to join together as I did. It was that I didn't form the curve over the wheel well correctly, but instead, as I now know, the lack of curving in this area was preventing me from getting the back area connected correctly. And that also explains, somewhat, why the back end of my build is kinda crooked/wonky – I forced the body together and twisted the tabs to hold it closed.
Ultimately, it took roughly six hours to construct this model.
