Build: Blue Dragon

Build: Blue Dragon
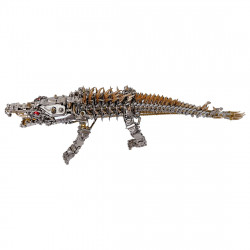
Ironically, the 250th Metal Earth model I've constructed is the first build I share on my new blog. Additionally, it was only fitting to go for a Dragon once again after building the Silver Dragon for the 150th build. And this one is really gorgeous. Naturally, my partiality stems from the fact that (a) I recently constructed it, and (b) I adore dragons!
It's also funny that I neglected to include LEGO Chewie for scale in the initial picture of the project that was the subject of my new blog. *facepalm*
Regretfully, when I began developing this beast, I had no idea if I would have this blog ready by the time I was done. Instead, I chose to record the entire process and post it to Instagram. To make the video fit Instagram's one-minute limit, I time-lapsed each stage.
I had really accomplished more on the blog than I had anticipated halfway through the build. Back injuries can severely disrupt your schedule so that those videos would work well in this blog post. Don't worry; I won't be sharing whole builds frequently. However, I decided to combine all of the Instagram posts into a single YouTube video for embedding in the post. A post with sixty or more embedded YouTube videos is not necessary!
Build Post #1, Steps 1-10
The first ten steps were covered in the first post. Yes, I didn't really think about it and decided which steps to include based on Instagram's limit on the number of photographs or videos you can share at once, rather than segmenting it based on the content I would be creating in the film. I also didn't do an excellent job of keeping my work in front of the camera, but I improved over time.
As you proceed through the various neck portions, these steps are very repetitive. It's just a bunch of [uneven] cylinder shaping, nothing too complicated. Alright, so it might be a little tricky to work out the unevenness, but I've become used to it by now, so it's not as frightening. However, a good set of drill bits will be helpful in this situation. I eventually discovered that attaching the fin segments to the back of the neck before shutting the cylinder was much more straightforward after finishing the first few pieces.
However, when you start putting the components together in Step 9, things really start to pick up. Although the tabs can occasionally be challenging to reach, Fascinations saved us the trouble by reducing the number of tabs connecting the segments by one (from the Silver Dragon). You may have noticed that I took a while to correct one part of the fin since I attached it backwards, even though these procedures were much sped up. I'm sorry. Additionally, I made some effort to make sure that every fin segment was "inserted" into the fin segment of the neck segment that came before it. This keeps things aligned and looks good.
The final teaser for this one is the attachment of a single headpiece to the neck. Although the angles are up to you, you can utilize the other parts of the head to guide yourself, as you'll see me do in the upcoming video.
Build Post #2, Steps 11-21
Since I integrated steps 20 and 21 into a single video, the following post addressed the remaining eleven steps. Building the head is the most fascinating part of this movie. The segmented portion of the tail is then built out using another block of repeating procedures. After erasing the original files from my phone, I had to download the first few posts' worth of video from Instagram, which has a maximum resolution of 480p. I apologize for the quality.
The most challenging aspect of this build is forming the head. Naturally, I could have made it more difficult because I attempted to add a slight curvature to nearly every component of the skull. In order to create a dish-like appearance, I tried to give the frill at the back of the cheeks a complex curve by bending each extremity toward the central point instead of all at the same angle. I attempted to apply a recurve, which is a curve that begins in one direction and then curves back in the opposite direction, to the beard and what I believe to be horns. Although it requires a lot more labour, the outcome is well worth it.
Ironically, the second most challenging aspect of this entire build was tying the head to the neck. Again, I'm probably to blame for this. I decided that I really wanted the tab at the front of the chin on the inside, so I deviated a little from the directions on this one. This meant that I had to shut that tab before attaching the head to the neck. After that, it was challenging to get all the tabs into the slots, particularly on the back of the skull. Unfortunately, I ended up using a blue Sharpie to "hide my sins," as Adam Savage would say when I scratched off some of the paint.
The remainder of the video consists of building out and connecting the tail segments. With the exception of attaching spikes instead of fin segments, these procedures feel similar to the neck building.
Build Post #3, Steps 22-27, 29-31
This post was quite difficult to put together. One of the stages (24) was lengthy, so I divided it into two films, but I was still aiming for ten videos or steps for each article. I thought I was done with the videos for the post when I got to Step 30, but I only had nine. As it happens, there isn't a Step 28 in the instructions! In any case, this post's videos show how to finish the tail, construct the wings, and join the wings to the first section of the main body.
I absolutely detest creating these dragons' final tail sections. If the videos don't tell you, I have enormous sausages for fingertips. Additionally, there are numerous tiny, spherical rings arranged closely together in the final section of the tail. Additionally, you must align two tabs with slots in a little area. Without tampering with the ring-like forms, you're affixing. It goes without saying that I find that challenging. However, this time, they added nano-spikes to the rings to make it much harder.
Now, please understand me. In the completed piece, I appreciate how those spikes seem. However, I didn't need to maneuver around this fragile object anymore! Furthermore, I foolishly believed that the spike—which is connected by a long, thin piece of metal that allows you to bend and position it in the center of the ring's back—was merely a bit of metal that wasn't completely cut off during production. As I was working on this build, I decided to cut off the first piece. On the second piece, I then noticed the same thing. *facepalm* Fortunately, I was able to get over this quickly because the model included additional of this piece.
The wings are stunning. They were not as beautiful as they were in the initial "coming soon" design when the webbing between the bones was not merely engraved on the wing-material parts but was a part of the raised bone pieces. Though they had to adjust that to fit all the parts on the sheets, I still thought that concept was great. They are still lovely, just the way they are. The webbing and texture look fantastic. Although they added more dynamic shaping to the borders of this model (over the Silver Dragon model), they are also relatively simple to construct.
The construction of the body segment and the attachment of the wings are the final steps in this stage. The wings really attach to the same part as the front legs, but this attachment is far more solid, which is another significant alteration from the Silver Dragon. Although I appreciate that the wings are now properly supported, I also understand how some people might miss having the option to put the wings at any desired angle. I like this approach. I discovered that curving the upper and lower portions of each wing outwards (away from one another) at the end seemed to match the diagram and was aesthetically pleasing, despite the fact that there wasn't much instruction on how to shape the connecting portion of the wings correctly.
Build Post #4, Steps 32-36
At this stage of the build, or more precisely, after completing Step 36 and examining the following stages, I decided to divide the postings by subject matter rather than by video count. Of course, I still had to keep it under 10, but that was not too difficult. The completion of the dragon's torso, or central body, is the only significant accomplishment this time around.
There is nothing particularly challenging here unless you dislike curved or rounded edges, in which case you are creating the incorrect model. Because of the size of the torso parts, attaching the shoulder/hip rings is relatively simple, just like in the last segment. Since the piece is so strange, the most challenging part of it was constructing the rump segment in Step 34. It's tricky to create and fill the gap effectively because the two asymmetrical cylinders are joined at an angle.
I should have explained how I handled folding tabs in the confined spaces while connecting parts, but I haven't done it yet. As you may have noticed, I use my hobby knife to assist in guiding the tab so that it folds in the desired direction. Sometimes, you have to fold it out, but if I have the space, I prefer to fold it inside because it's less noticeable that way. In any case, it is helpful to have a thin but strong tool to persuade the tab to begin folding in one direction or the other as it moves through the slot.
Build Post #5, Steps 39-44
I chose to divide the postings by topic rather than video count because of the following four videos. Each video covers the six steps involved in creating a leg. Given that the most recent post already included five videos, that doesn't divide up well over ten-step posts. Thus, each would receive its own, and the earlier set would be self-contained. Additionally, because of their similarities, I share all four of the leg posts simultaneously on Instagram.
Hips don't lie, and these hips aren't easy. I called the shoulders of the half-dome piece in my Instagram post, but I should have called them hips instead because dragons have legs, not arms. A dome shape is the most challenging form you will encounter with Metal Earth models because domes curve in multiple directions at once, which flat metal dislikes. Fortunately for me, I have some tools to help with that.
For this kind of stuff, I initially utilized marbles, which worked. Additionally, because glass is slick, I frequently stabbed my fingertips with tabs as a result. After watching a video in which @animateorange discussed fondant shape balls, I located and purchased them from AliExpress. They are excellent, and I have used them for some time. However, Animate Orange then gave me the privilege of testing a tool prototype that he had created. His Etsy site now sells that dome-shaping tool, and I heartily endorse it. In the end, I used that prototype for these videos. Although their sizes occasionally match better, I still have the fondant tools because I like the way they hold.
I've talked enough about the tools, though. Since this hip-piece is a half-pipe connected to a tapering cylinder via a half-dome, it presents an additional obstacle. Isn't that a lot of fun? Since the type is utilized in both the Dragon Flame from Piececool and the Silver Dragon from Metal Earth, I have some familiarity with it, so it wasn't too horrible for me.
The lower leg, or shin, is a relatively straightforward tapering cylinder. As easy as tapered cylinders can be, that is. By now you ought to be an expert at those, don't you? Actually, it's not that easy. You need to exercise particular caution because of the way these pieces attach to neighbouring parts. Focus primarily on the shape of the apertures at the ends of the tapered cylinders. When viewed perpendicular to the aperture, they will often form oval openings at the end. However, you actually want this opening to be round. To make it more circular, open it with a cylinder shaping tool. You'll enjoy this eventually, I promise.
What I refer to as the knee cover is the next difficult section. This leg's devil is created in Step 42 and is a challenge due to compound curves. Since it's not dome-shaped, this one requires a little more guesswork. Additionally, you must spread it open to fit over the knee and then close it again if you form it entirely before attaching it. Even yet, some knees, such as this one, don't ultimately line up or close all the way. As was the case with this leg, scratches could result from this. Rescued by the Blue Sharpie!
You reach the foot at last—such a long, thin piece with so many folds. I strongly advise attaching the claws, unfolding the folds around the toes, and then completing the folds. Although the instructions illustrate this, I folded it even less than they indicated. You can complete moulding the toes once the claws are attached. You'll likely discover that the back of the foot doesn't align very well as you proceed. That can be fixed by gently twisting the side parts. You should bend specific tabs so they line up straight before attaching the top of the foot. In particular, the heel tab and the three tabs above the toes. Although it will make things much easier, they don't appear to need it.
Attaching the foot to the leg is the final step in this segment. The effort to smooth out the shins' apertures pays well here. As you can see, the foot's attachment point is round rather than oval. Getting those tabs through the slots and twisted shouldn't be too difficult if you're ready. You've made a leg, and voilà!
Build Post #6, Steps 47-52
This video covers the left-back leg. I won't go into specifics because it's very similar to the front left leg. The leg is positioned differently, so the curves and angles are a little different, but I'm still going to include it. But I don't have anything insightful to say about it.
Build Post #7, Steps 54-59
And the right front leg. Again, I'm ignoring the commentary.
Build Post #8, Steps 62-67
You guessed it. The right rear leg, without any explanation!
Build Post #9, Steps 36-37, 45, 60, 53, 61, 68
Yes, you saw that when I went through the legs between videos, I skipped a few steps, and they all ended up here! This is because, like most models, I constructed this one throughout multiple sittings. I've started looking ahead and following directions out of sequence as a result. I can leave my models in a more stable state in between sittings because of this. With this dragon, that is unquestionably true. And the video series went smoothly, so I was able to end on a high note!
Attaching the legs is the only aspect of this build sequence that truly merits discussion. It's challenging because you have almost everything else attached at this point. Everything obstructs the tabs that link the legs from being folded or twisted. Regretfully, a large portion of that occurred outside of the video frame. Because it's so hard to figure out the optimal angle of access. Naturally, I made things more difficult for myself than necessary because I always try to avoid twisting any tabs on a model's exterior.
However, because there wasn't enough clearance, attaching the front legs was particularly challenging. I couldn't get all three tabs positioned entirely at once. In the end, I had to fold two of the tabs while leaving the third tab just aligned. I then used considerable prejudice to persuade the third tab to sit and fold thoroughly. It wasn't lovely, and it caused at least one scratch (time for a blue Sharpie!). However, it was completed.
Finally, the Blue Dragon was finished. I've finished writing this lengthy piece! This will likely be the longest post for a while. This is the length of most build posts. Of course.
